LumaFusion is one of the best video editing applications on iPhone and
iPad, with a large number of powerful tools such as the possibility of
adding multiple audio and video tracks, adjusting colors, resizing
videos without losing quality, adding keyframes...
LumaFusion
provides support so users can import content from external mediaBe it a
hard drive, USB drive, or SD card. Apart from that, they can also export
the created videos to the connected external unit and browse the
content we have stored on the connected unit.
The Lumafusion Interface
Let’s get acquainted with the LumaFusion interface so you know where to find all the features and functions.
Import area
The panel in the top left is the Import area. When you first open a new project, this will default on the Photos tab. You can access all photos and videos here.
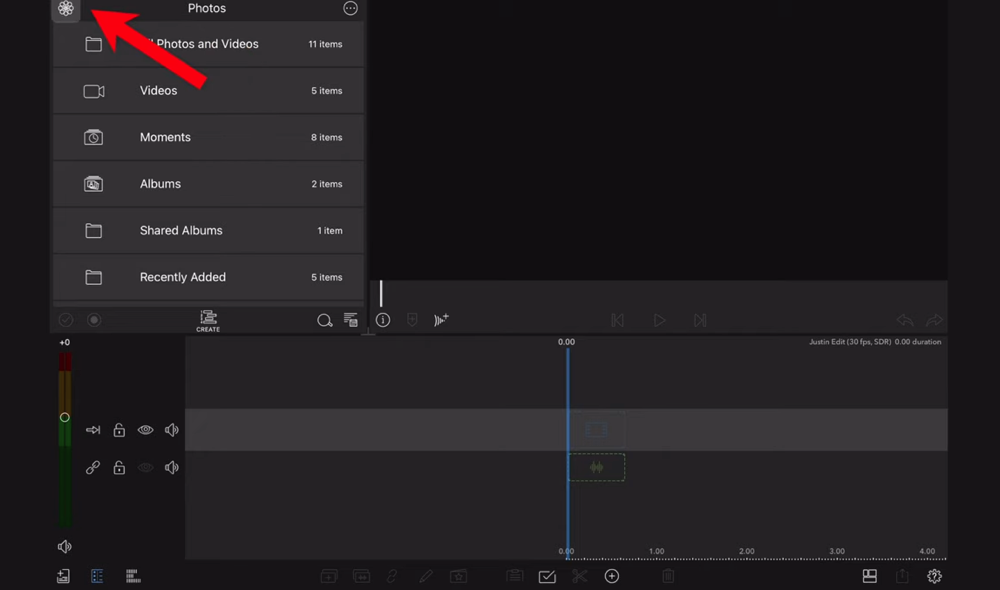
The top left panel is the Import area where you can access all files, media, titles and transitions
To access all other Sources, press the Photo icon in the top left corner. Then you can switch to other sources such as Files, Imported, Storyblocks, Titles, Transitions and Music.
If you can’t find the clips you want to import, go to the Import button in the top right and select Import Media.
Playback Window
The black window is where you will preview the project as you’re working on it.

Preview your video throughout the editing process in the playback window
Layout
If you press the Layout button on the bottom menu bar, you can switch between different screen layouts to maximize your screen real estate. Given that you’re working on a smaller sized screen with iPad or iPhone, this is an awesome feature!

Tap the Layout icon to rearrange the panels in a format that will make editing faster for you
You can even resize the different panels to suit what you’re working on at any given time. To do this, tap the intersection between the panels and drag it around until you reach a layout that works for you.
Bottom Menu Bar
The menu bar in the middle bottom of the screen is where you can access editing functionalities like delete, paste and split.
Volume Levels
You can adjust the volume levels for different audio and video tracks by tapping the Audio icon in the bottom left.
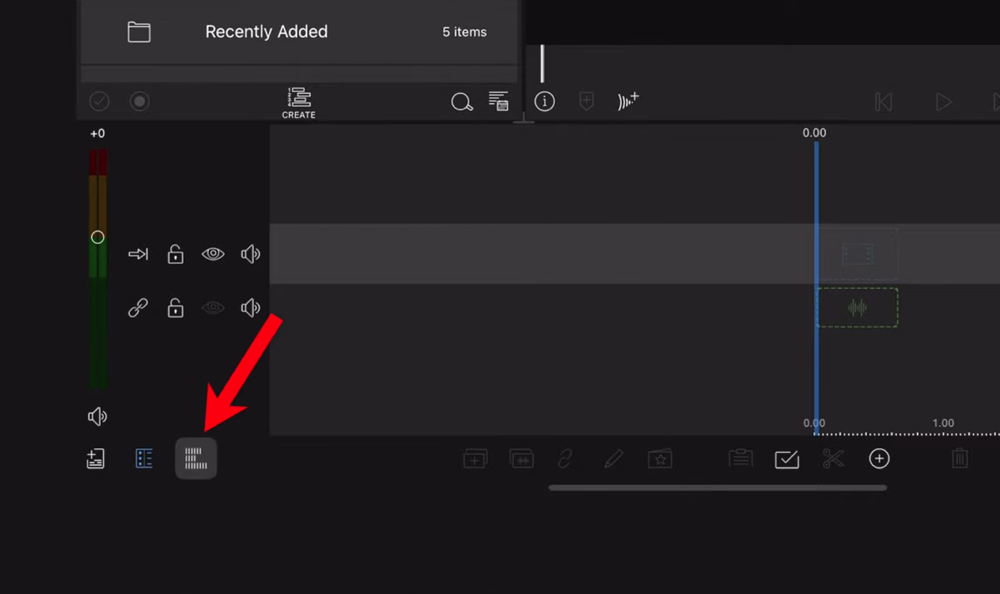
Tap the Audio icon to make any adjustments to the audio tracks
Track Header
The button on the left of the Audio icon is the Track Header. It allows you to apply settings to clips in an entire row rather than a single clip or the entire project. This is where you’re able to do things like lock, turn visibility on & off and make some audio adjustments.
Project Window
You can switch between projects super easily by tapping the button in the very left bottom corner. All current projects will appear and you can create a new project here as well.
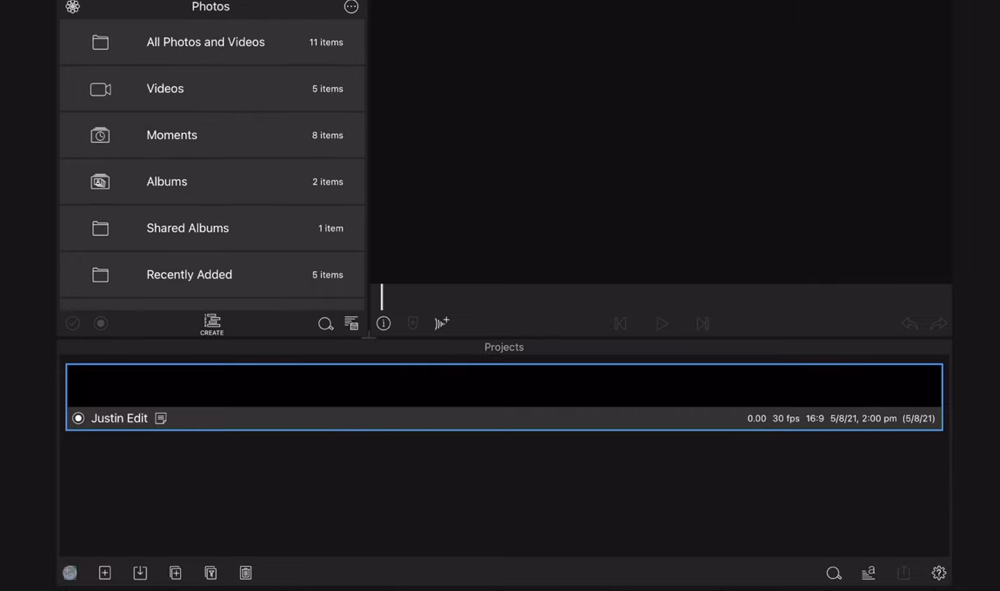
The Project icon in the bottom left corner allows you to switch between projects
Editing Timeline
This is your standard video editing timeline where you’ll drag in all of your footage and audio for editing.
Now let’s import footage.
Komentar
Posting Komentar